Do you need a screw for a ceiling fan box that’s slightly smaller than the one that’s included? Look no further. The sizes available are flexible to meet most requirements. We will introduce you to the different types of screws and tell you which ones are best for installing a fan box.
What size screw for ceiling fan box?
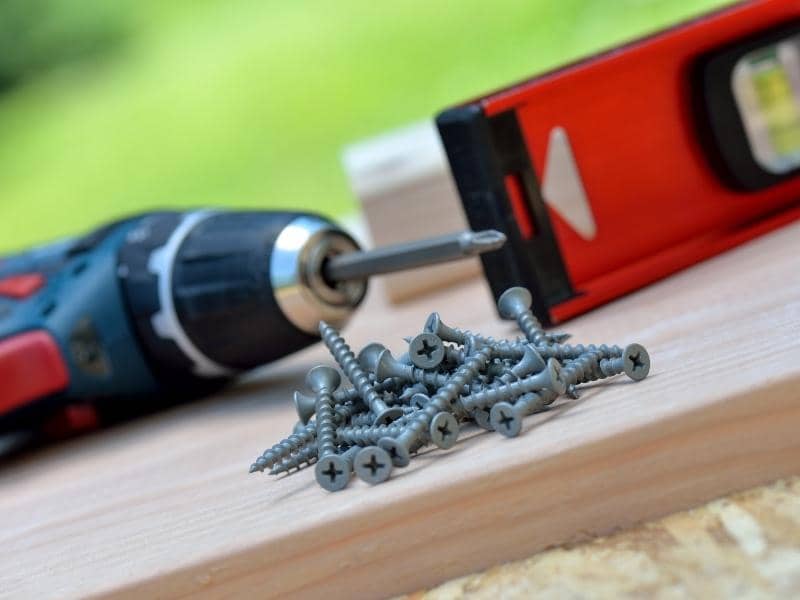
Ceiling fan switches are usually attached with 8-32 or 10-32 screws. It is best to use screws with hex heads and round heads in the fan box. Screws with an 8-32 thread are suitable for standard ceiling fan installations. A ceiling fan box requires countersunk screws of sizes 10-32 or 12-24.
Table of Contents
In addition, the screw length you choose can also play an important role in the strength of your fan installation. Using long screws makes the wall assembly more difficult to install, and can result in dangerous vibrations as well as secure performance if properly installed.
The type of material that you are working with will determine the type of screws that will work best for the installation. For instance, if there is drywall above your fan box and it can be drilled through, you will need to move the fan box.
In that case, a screw with a head that can be pierced (like an Auger bit) is required to firmly hold the switch in place. Unless you take this precaution, the vibrations from the fan could endanger the electrical supply.
Are all ceiling fan boxes screws the same size?
A ceiling fan box screw is not always the same size. It is of the utmost importance that you select the appropriate screw size for your boxes to ensure that your fan will fit properly and will function without any hiccups.
The sizes 8-32 are the most common ones found in standard screws.
If the screws in the ceiling fan box are not the appropriate size, you may need to replace them with screws that are the appropriate size. This is because many ceiling fan boxes are designed to accommodate a particular type of screw.
And the screws tend to become loose over time and fall onto the blades, which could result in serious injury or even demise.
Check the dimensions that are listed either on the packaging of the screws themselves or on the websites of the retailers who sell them online to determine which screws will work best with your box.
In addition, before making a purchase, measure the head of each screw against those dimensions and confirm that the measurements are the same.
What size screws fit in ceiling fan junction box?
The most frequent type of screw used in electric boxes is the 6-32 flathead screw. For ceiling fan junction boxes, however, 8-32 or 10-32 screws are recommended for securing the connection. Different types of screws fit into different types of ceiling fans’ junction boxes.
If your ceiling fan does not have an electric light kit, for instance, you will need medium or small screws, such as 6-32, to secure it in place.
You can use either large or extra-large screws such as 10-32 or even larger ones if the sole purpose of your ceiling fan is to increase air circulation and it does not include a light kit.
To determine which screws are appropriate for your specific fan, consult either the installation instructions provided by the manufacturer or the box itself.
What kind of screws for ceiling fan boxes?
The ceiling fan box is best secured with round head or hex head screws. The point of a round head screw is smooth and rounded, which makes it easier for the screw to slide into the wood. When you tighten the screw, there is less of a chance that the threads will be stripped out.
Hex-head screws are very similar to round-head screws, with the exception that one end of the hex-head screw is hexagonal. In the junction boxes, you’ll frequently find various types of screws and bolts, such as carriage bolts, wingnut screws, and flat head screws.
It is important to remember that the sizes of screws and bolts can vary, so before you put any pressure on the screw, make sure you measure the head of the screw you are using. A screw can cause damage to your ceiling and junction box if it is either too big or too small.
How to size a ceiling fan box screw size?
If you use screws that are the appropriate size for the fan boxes, you can avoid any damage to the ceiling. Use the following steps to determine the size of a ceiling fan box screw:
Measure the circumference:
Measure the outside of your junction box. The length of the screw that you intend to use should be approximately 2 inches shorter than this measurement. For instance, if you are using screws with a length of 2 inches, measure 1 inch and round it up.
Determine the screw length:
Calculate the length of the screw by multiplying the circumference by two. For the best results, use a number that is close to 1.5 or 2 inches if you are using round head screws, which is highly recommended.
Find your thread size:
After you have established the length and diameter of the screw, you can find the appropriate thread size by searching through The Home Depot’s extensive inventory of screws, bolts, and nuts.
Select the screw:
Choose the screw by picking it out from our selection and locating the product information sheet (PDF) for your screws, bolts, and nuts to determine its corresponding size in millimeters.
Compare thread size:
Check to see if the length of the screw is comparable to the diameter of the junction box. If they are the same, select the screws and use either a wrench or a screwdriver with a Phillips’s head to snug them down.
How do you secure a ceiling fan box?
For a secure connection, use screws with studs and place washers under the screw heads. Here is the guideline on how you can secure the ceiling fan box:
Find the location of your ceiling fan box by following the duct or joist:
To begin, sketch out the configuration of your ceiling on paper and use a pencil to denote the boundaries of each box. Second, before you screw any fixtures into place, check with a level to make sure that all of the boxes are vertical.
When the fan is turned on, this will keep it in place without moving.
Proper installations:
If you will be using screws, first pre-drill a tiny hole in each box, and then screw the fixture into position. It is necessary to put pressure on the fixture from all of its angles to ensure that it is secure.
Loosen any bolts or wing nuts that need it so that you can replace them with new fasteners without having to take your fan off of its mount. After the part has been installed, you should hand-tighten each nut until it is secure before remarking the part and beginning again.
Screw down the fan box:
Secure the box to the ceiling with at least two 2-inch screws per side. Use the corresponding screws and washers provided in your kit when installing a light kit or any other additional components.
For example, if your light kit comes with six Phillips head screws, use six of them – three on each side of the fan box.
Add insulation:
Cover the screws with a piece of foam sealant to prevent light from entering. After that, wrap weather stripping around the edges of the fan box. Bolts and wing nuts are also required to fully secure a ceiling fan box.
Finish up by adding wire mesh:
You can add wire mesh to the closure to help reduce noise and keep bugs out. Apply a layer of foam sealant to the top of the mesh and securely screw it down.
Now that you know how to secure a ceiling fan box, make sure you do it correctly so that your fan stays in place and runs smoothly.
Final Thoughts
For the ceiling fan box, 8-32 screws are required. The most prevalent type of screw for a ceiling fan box is the Roundhead. Secure the fan box with a minimum of two screws per side using 8-32 or equivalent screws. If you have a light kit, use the screws and washers that came with it.