Everyone would want it to be comfortable when they prepare their food, set up their dinner, or operate their electrical appliances like a coffee maker or toaster. A toe kick goes one step further in taking care of that for you!
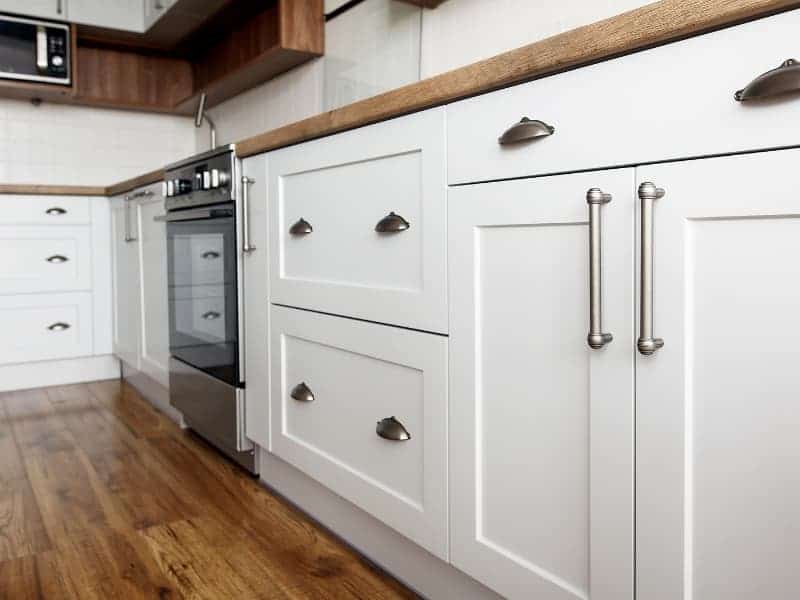
Simply a dented space on a lower cabinet, a toe kick provides some much-needed room and breathability for none other than your toes!
These make sure that your feet are relaxed in a cozy manner beneath a small site of the cabinet or kitchen island, letting you reach and work on your countertop without having to bend over.
Does A Kitchen Island Need A Toe Kick?
It is completely up to you whether to install a toe kick in your kitchen island or not. You might spend a lot of time in your kitchen for many activities. Having a toe kick makes it easier for you to work on your countertops with great pleasure. To some, toe kicks may seem outdated.
The toe kick provides enough space for your feet to be rested while you work on the countertop. It allows you to improve your balance and lessen the exhaustion that you might face while you reach far across your kitchen island.
Your stance might be affected by all the constant strain on your muscles from having to reach across. You might even stub your toes while working.
With these benefits, there are some drawbacks. You will not be able to clean under the cabinets due to the external toe kicks. Toe kicks are also considered to have been a backdated style.
Table of Contents
Is A Toe Kick Necessary?
The main reason why a toe kick might be necessary is the fact that they supply crucial space for you to rest your toes. This allows you to get hold of the tasks on your countertop without the hassle of having to lean over and stretching your toe, hips, and back!
A toe kick might be necessary based on the amount of work you carry out on your kitchen countertop. If you’re someone who likes to spend a lot of time in the kitchen, you should probably have toe kicks installed onto your kitchen island and cabinets.
Toe kicks also provide a traditional design at the end of your cabinets. They give your furniture and cabinets a clean and tidy finish and, at the same time, covering up any mess underneath your kitchen cabinets and island.
How Does A Toe Kick Benefit You?
A toe kick’s main advantage is the fact that it acts as one of the most crucial home ergonomic elements inside your kitchen. It provides essential space for you to rest your toes, and at the same time, acts as a conventional design element underneath your cabinets and kitchen island.
Using a toe kick allows you to work as comfortably as possible, without straining your back or other muscles or stubbing your toes. You do not have to hunch over your countertops in order to carry out your tasks.
Most installers are very used to installing toe kicks as most homes have them and most cabinets have them pre-installed.
How Do You Cut A Toe Kick?
Things you’ll need:


You can follow these simple steps in order to cut a toe kick flawlessly:
- Calculate the distance between the base of your desired cabinet and the floor.
- Measure the width of the space at the base of your cabinet.
- Measure out a 1/4th inch of plywood and mark the two estimations of the gap between the cabinet and the floor. You should measure twice before cutting once!
- Use a circular saw or a blade in order to cut the toe kick to your measured dimensions.
- Set down the toe kick beneath your cabinet. You can use a small hacksaw or drill to scrape off small pieces of wood if your toe kick fails to fit according to the measurements.
- Use a nail machine or a hammer along with some nails to attach the toe kicks in place just as you want!
How Far Back Should A Toe Kick Be?
A toe kick’s depth should be decided according to your needs. Typically, the recessed space available for a kitchen cabinet in America toe-kick has dimensions that are 4 inches in height and 3 inches in depth.
Movable cabinets have adjustable legs that need to be covered with much higher dimensions of toe kicks. These European style cabinets normally have a height of 5 to 9 inches with almost the same depth as their American counterparts.
A toe kick should not be too tall as it can take up unnecessary space underneath your cabinet. If your only purpose of a toe kick is to adjust kitchen ergonomics, you should opt for shorter, smaller toe kicks. If you have other purposes such as storing soap, cleaning stuff, utensils or plates under the toe space, you can choose toe kicks that are of greater length!
How To Install Toe Kick On Kitchen Island Cabinets?
Following the simple steps below, you’ll be able to install toe kicks on your kitchen island cabinets or any cabinets for that matter.
- Assemble the longest piece of toe kick first. This allows you to have extra wood available to you that you can just cut down later if you make errors.
- Use a very sharp blade to cut the toe kicks according to length after you have set the toe kicks down according to your chosen spots. You should always cut once and measure twice and try to fit the toe kick in place after each cut!
- Sandpaper or a wood sander can be used to touch up the edges of the cut-out toe kick.
- Finally, you can install the toe kicks on your kitchen island base cabinets. The best way to do this is to use a nail machine to nail the toe kicks in place. You should always nail at the very bottom or base of the toe kick and again at the very top in order to conceal them properly.
How Do You Replace Toe Kick Under Cabinets?
You might have thought of remodeling your kitchen and that requires the removal of the toe kick. You can always just replace the toe kick using the same process as removing them.
- Initially, you should focus on loosening the molding of your toe kick. Use a pry bar and wedge it between the top of the molding and the toe kickboard. A hammer can be used to tap the pry bar to loosen the molding. Move across the entire length of the toe kick and remove the molding once loose.
- Secondly, find a space between the end of the toe kick and the cabinet board. Thrust the pry bar slowly between the end of the toe kick and the cabinet frame. Continue tapping the pry bar to loosen the toe kick from the cabinet until it finally comes off.
- Finally, once the toe kickboard and the toe kick loosens up, you can slowly pull them apart from the cabinets. Make sure you do it slowly as to not scratch your floor in the process.
Just follow the installation guideline with your preferred toe kick replacement to put the new ones in place after removing the toe kick.
What Are The Toe Kick Dimensions For Kitchen Cabinets?
The best choice of depth for a toe kick is 3 inches. It provides enough required space to maintain your balance and stand in a cozy manner while using your countertops. If you have toe kicks that have a greater depth than 3 inches, it is absolutely fine.
A depth of fewer than 3 inches should be avoided as it interferes with the ergonomic comfort of your kitchen. Most factory and store-bought cabinets come with pre-installed toe kicks of 3 inches in depth!
Common heights of toe kicks are 3.5 to 4 inches while 3.5 inches being the optimal height. You can opt to increase the height of the toe kick but it will reduce the space available in your base cabinet.
Toe kick dimensions can often be customized according to your needs although it is very rare to do so. For instance, a family of tall people might prefer larger custom-built toe kicks to increase their comfortability.
In the above feature, we explained why a kitchen island might need toe kicks and the steps that you can follow to easily install toe kicks on your cabinets. A detail of the typical dimensions is also explored here.