Wiring in any infrastructure should be put in organized ways. No matter if it is a crawl space in the basement, attic, open space, garage, or kitchen, No one would want a haphazard look. Along with serving the principal purpose of wiring, it needs to look aesthetic.
Questions such as whether to staple Romex or if it is possible to stack them under one staple may arise? We suggest you read the article if you have similar queries in mind and clear your understandings.
Do you have to staple Romex?
One needs to staple Romex. When stapling, the Romex cable should maintain a distance of 4.5 feet. It is advisable to staple after every 2 feet. The building code of an area also suggests a measurement. Staple Romex when you do not have immediate access to the cables. It also adds to the aesthetic.
Table of Contents
Staple Romex to make things look organized and avoid accidents. However, do not staple them compressed. If the staple is too tight, it can damage the insulation rubber underneath over time. Again, it may expose the conductors in between.
If you are stacking up wires under one staple, metal may rust up over time. It is especially true for the humid area. Also, the cables may end up touching each other.
Pick a plastic staple to avoid this problem. It won’t erode quickly. Nonetheless, it may not be a sustainable solution.
Now let’s look at whether it is possible to staple Romex cable into a crawl space and on a wall.
Crawl space:
Crawl spaces are generally 1.5 meters tall. The places are mostly dry. However, if you find them damp, then you should address it.
It is okay to staple Romex in crawl spaces. Since it is a place where you won’t have immediate access to the wires, it is better to pin them with a staple.
Walls:
It is again okay to use staples to fit Romex on a wall. When you fit the wires with staples, it will give a more ordered look. It is essential to have a stud or frame to staple the Romex cables.
4 reasons why romex need to be stapled
There are a plethora of positive aspects that you get from stapling Romex or NM cable. Here we have compiled some insights on why you need to secure Romex cables with staples.
Support cables:
When you staple Romex wire, you can prevent the wire from getting pinched and compressed. It may lead to rusting and damaging of cables. Again, a wire tends to stretch over time. It will eventually fail. To avoid such a situation stapling cables can help.
Help organize:
Stapling wire not only helps you avoid different issues but allows them to look organized. It adds to the aesthetic purpose. You can arrange the wire neatly. It will again add to security. Moreover, you may avoid mess and tangle. Also, the wires won’t be loose.
You can also easily trace back them.
Ensure safety:
When you keep the wires not fitted into a place, they may become loose over time. Also, the cables could get exposed with friction and wear off rapidly. This type of disorder can cause serious accidents such as electrocution.
Hence, when you pin them with a staple in a place, they remain safe for a long time. They will not hinder each other’s way. Also, you do not need to worry about issues with the wires you do not have easy access to.
Lessen damage:
The Romex or NM cables would not wear off pretty soon when you secure them with staples. Also, you can minimize the damage to the wires. The staples limit the frictions between each wire, also avoid loosening.
Are insulated staples required for romex? How often do you have to staple romex?
The main difference between an insulated and non-insulated staple for Romex is the former has a plastic or insulated cover while the latter does not. The insulated one is better looking as well as gives you more assurance of security.
However, that doesn’t mean that the non-insulated ones are unsafe to use.
Now we should use an insulated version of staples only? The answer is no. It is not strictly imposed by the building code or not an NEC requirement. It is up to you to choose what type you want. The staples we get in the market come in various measurements.
Again, there are building codes for how often you can use a staple on the Romex cable. Put staples or other similar things such as clamps or braces 4.5 feet apart. No further than this. It is advisable to staple every 2 feet.
Where to staple romex?
One should make support or stud for Romex or NM cable by framing when running through ceilings, floors, and walls. The National Electrical Code (NEC) has regulations to secure NM cable and other electrical wiring.
It helps prevent the unnecessary movement of the wire that could cause loose connections or even damage the cable.
So what are the places we need to staple Romex cable? Here’s a detailed overview.
Staple on wall/ceiling:
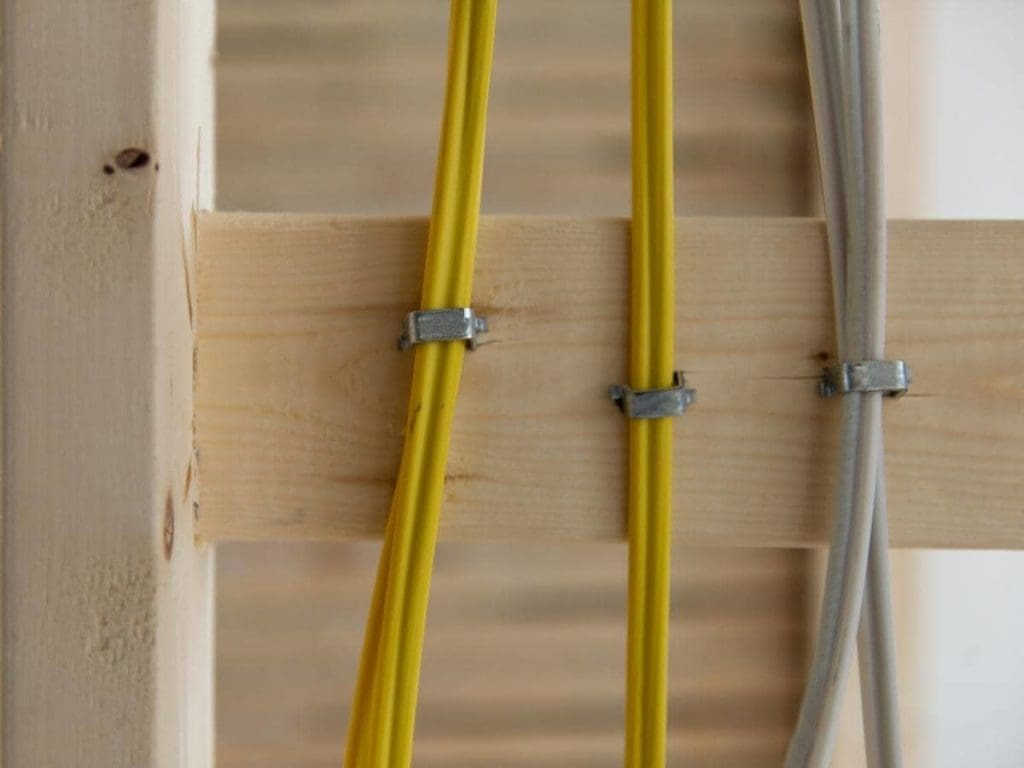
When you need to staple Romex on a wall, make sure you are using a frame or a wooden stud. It will be easier to install and also works surface.
Staple Romex or NM cable on the wall to avoid loosening, disorders, or accidents. You can also fasten the Romex cable on the ceilings.
On crawl space:
Crawl spaces are mostly inaccessible most of the time. It is best if you can staple the Romex into those places. Hence, you do need to worry about your wire damage. Make sure the area is dry.
On closed space:
It is again better to staple the Romex cables in closed spaces. The wires will become organized, allowing a sense of security. You can avoid loosening or damaging wires when stapled.
How to staple romex?
It is easy to staple Romex on a wall using a wooden frame or stud. There are many available sizes to set different types of Romex cables. Here we have explained the step-by-step process on how to staple Romex.
Staple structure:
The staple has two sharp-ended hands. With the sharp part, it is easy to pin down the staples on a stud or wooden frame.
The two heads also have tabs to let us know when we have to stop hammering the staple into the place.
Stapling:
Use a simple hammer. Take your Romex wire. Set it on top of the wooden stud surface. Now place the staple around the wire it. Make sure one hand is on the right side and the other one is on the left side of the wire. Do not pierce it through the wire.
Hammer:
Hammer the pin down. Push it according to the circumference of the wire. You cannot put pressure on the wire. Press it down to such a level that the wire is still movable.
In most cases, you can stack up to 3 Romex cables under one staple. However, you need to meet certain conditions.
What size staple for Romex?
There are specific sizes of staples made for different types of Romex or NM cables. Here we have listed some Romex cables with their compatible staples.
12/2 Romex:
Firstly 12/2 Romex. Most workers would use ½ inches of a staple for this size of Romex cable.
How many you may need depends on the brand of NM cables. You can either put one or two NM or Romex cables under one ½ inches staples.
9/16 Romex:
For a 9/16 Romex cable, the available size of staple could be 1/2 inches. You may again use it on 14/3, 12/3, 10/3 Romex, or NM cables. It won’t allow splitting of wood and protects cable insulation.
8/3 Romex:
For an 8/3 Romex cable, you may use a½ inches EMT drive strap. Otherwise, use 310 staples tippled staple. This cable is wide. We do need to consider the width of the staple according to the thickness of the cable.
6/3 Romex:
For a 6/3 Romex cable, you can go for all metal ¾ inches staple. Why all metal? It will allow you to eliminate the depth restrictions that occur in a plastic-made staple.
3/4 Romex:
Again for ¾ Romex cable, choose 1.13 width staple. It also is suitable for Romex wires such as 14/3, 12/3, 10/3. Since it is plastic-made insulation, it doesn’t deteriorate or rot.
Final Thoughts
It is a good idea to staple Romex or NM cable when wiring. It allows the wires to set in organized ways and a better view as well. Moreover, the cables won’t dangle or hinder each other’s way. The damaging and wearing off of the wire also lessens. All these could save you from occurring accidents.