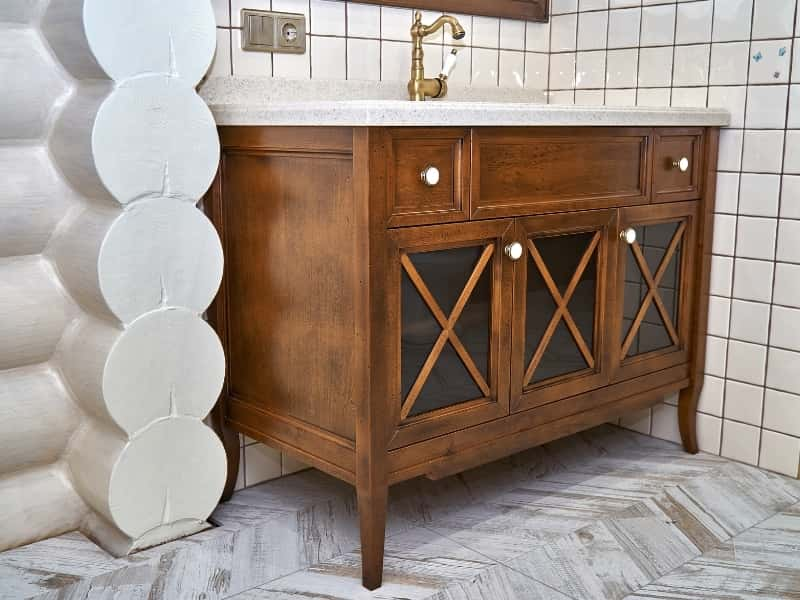
Suppose you have recently renovated your bathroom with exquisite vanity cabinets. In that case, you must have noticed that your vanity makers have only finished the exposed area while the backs of your vanity were left open, attaching to the back wall of your vanity cabinet.
Do bathroom vanities have backs?
No. Typically, bathroom vanities do not have backs. Cabinetmakers design it such that only one side of your cabinet thrusts into the wall, providing it access to the plumbing pipes originating from the back wall. Generally, they give finishing to the front part and leave off the backs.
Table of Contents
Why doesn’t a bathroom vanity have a back?
Bathroom vanities don’t have a back to give access to your plumbing fixtures behind the cabinet. It allows you to check your pipelines from time to time. And you will be able to notice any leakage beforehand.
If your bathroom vanity is just exposed from one side, it is widespread for the builders only to give finishing to that area, leaving the backside because the back part is invisible.
If you’re installing a custom bathroom vanity cabinet, then your builder will remove the frames from either side of your cabinet to give it a better fit and add fillers or pillars and install it back on the wall. Thus, it provides your vanity with a custom fit.
Do I need a backsplash behind the bathroom vanity?
Yes. You need a backsplash behind the bathroom vanity to protect the back wall of your sink from water damage.
Backsplash protects the back wall of your sink from collecting moisture, which will eventually give protection against rotting or warping inside your wall, weakening the internal infrastructure. You will be able to prevent future mold or mildew from having a backsplash behind your bathroom vanity. It will save you from financial expenses and mold-related health complications.
Why do I need a backsplash behind the bathroom vanity?
If you’re wondering whether to install a backsplash behind your bathroom vanity, then you need to know the following aspects.
Six reasons why you need a backsplash behind your bathroom vanity-
Protection from water damage:
A backsplash will protect the wall behind your sink from collecting moisture. As a result, there will be no rotting or warp. It will also prevent the growth of mold or mildew, which may be harmful to your health.
Also read, Are Bathroom Vanities Waterproof?
Cleaning the wall:
You will find it easier cleaning behind the bathroom sink if there is a backsplash. Backsplashes are known to have features like easily wipeable and keep the area dry. With cleanliness, backsplashes allow you to design a more elegant bathroom with color, texture, and shapes.
Flexibility in options:
You will have more flexibility in choosing the materials decorating your bathroom vanity. You don’t always have to go for the traditional ceramic tiles while building your backsplash. You can opt for stone, laminate, mirror, tempered glass, or washable wallpaper anytime.
High traffic bathrooms:
It’s not mandatory for you to have a backsplash behind your vanity, but if you want to go beyond the traditional 4 to 6 inch counter splash, you have so many options to choose from while installing a backsplash.
You can either go the full-wall length, tile border or extend the tabletop, making it look bigger and bolder with your personal preferences like going sustainable.
Creative with faucets:
If you don’t like the old monotonous 4-inch height of the bathroom vanity backsplash, you can increase the height twice and install a waterfall faucet. You can also redo it with a pedestal sink in order to have a better view from your bathroom without the tile or stone backsplash.
Focal point:
If you have a small bathroom and you want to make it look attractive, then just adding wallpaper above the bathroom vanity is a great way to stand out your overall bathroom look.
But it should be water-resistant.
How to install a backsplash on a vanity?
If you want to install a backsplash on your vanity, you need to take the old backsplash out. Or, if this is your first time installing a backsplash on a vanity top, you might want to follow some guidelines.
First things first, make sure you have all the necessary pieces of equipment –
- Silicone caulk
- Structural adhesive
- Tape
- Sandpaper
- Utility knife
- Cleaner
- Old rags or clothes
- Paper towels
Ten simple steps to install a backsplash on a vanity-
Step 1:
Clean the area where you want to install your backsplash with your cleaner. Make sure there are no remaining soap bubbles or dirt. Let the area dry.
Step 2:
Take your sandpaper and sand the selected area until it is smoothened out. You can use 120-grit sandpaper. Sand well if you have a textured wall.
Step 3:
Press the structural adhesive in the centre and all the corners on the back of the backsplash in a ring-shaped manner.
Now carefully position the backsplash on the wall and adjust it well such that the ends of the backsplash coordinate with the outside border of your vanity top. Apply a firm pressure so that it sticks to the wall.
Step 4:
Glue the vanity top’s meeting point and the end of the backsplash with the tape. Keep a gap of ⅜ inch between the tapes.
Step 5:
Remove if there’s any extra adhesive discharge from the below of backsplash. Then force the backsplash against the wall.
Step 6:
Cut the tip of the tube of silicone caulk at a 45-degree angle. Cut it close to the tip of the tube end. Illustrate the caulk tube in the joint section of the vanity and the backsplash at a 45-degree angle.
Step 7:
Submerge the paper towel in clean water. Let it allow the moisture slightly. Press the caulk into the joint of the vanity top and backsplash placing the paper towel along with the caulk blob.
Step 8:
Lastly, pull out the tape from joints of the backsplash and vanity top. To smoothen the corners of the backsplash run the damp paper towel throughout the area.
Step 9:
Keep applying caulk until the borders of your backsplash touch the wall. Let the backsplash area dry overnight.
Step 10:
To get a better finishing, apply the caulk again. And let it dry for another 24 hours.
Are 4-inch backsplashes outdated?
Many people prefer the new modern full-height backsplashes considering it to be trendy, while others opt for traditional 4-inch ones.
But 4-inch backsplashes are still one of the most popular backsplashes amongst customers. So it totally depends on your personal preference.
As 4-inch backsplashes leave a large part of your bathroom wall open, you can always opt for a designer paint color or go trendy with tiles. If you change your mind later, you can again redo your bathroom wall. So 4-inch backsplash can be a handy and considerable way to go.
However, 4-inch backsplashes might be outdated to many people who want a high-end or customized look for the bathroom because there are now complete height alternate materials like stone counters, laminating, or tiles.
But many people still prefer a 4-inch backsplash that you can easily modernize to give it a unique and fresh appearance.
What can I use instead of a backsplash?
If you don’t want backsplashes in your bathroom and are looking for its alternatives, then we are here to guide you. Five best alternatives to use instead of a backsplash-
Paint:
You can try painting the entire area instead of installing a backsplash. Try bold colors that go with your personality or faux-finish spray paint. It will give a terracotta or sandstone finish.
Tiles:
Try using tiles for full height behind the sink. You can choose it in different colors, shapes and textures.
Stone slabs of marbles:
Nothing beats the beauty of nature like stone or marble. You can outstand your bathroom look with these timeless beauties to get both the traditional and modern vibes.
Wallpaper:
Wallpaper is an excellent alternative to the backsplash. They are available in endless colors and patterns.
Beadboard:
Beadboard is a smart choice if you’re looking for something less modern. Give finishing with a rail molding at the top of this board. Paint it to add texture and warmth to your bathroom.
What type of backsplash is easiest to install?
Faux tin ceiling tiles are the easiest type of backsplash you can install in your bathroom. These smooth tiles are made such that they look like metals but are more durable and affordable, coming with various patterns and colors.
To install these attractive tiles, you need just three types of equipment – these tiles, scissors for trimming purposes, and the appropriate adhesive. That’s it! With only these three materials, your new classy and aesthetic backsplash will be ready within a glimpse of eyes!
Faux tin ceiling tiles have another good feature that is water-resistant. So you won’t need to worry about the water damage either.
What is the easiest backsplash to clean?
Tile backsplashes made of quartz, porcelain, ceramic, metal, and glass are the easiest to clean in your bathroom.
They are durable, water-resistant, naturally non-porous, resist scratches and staining, and the tiles are also easy to maintain because you need not buy any special cleaners or make treatments.
All you need to clean these tiles are non-erosive cleaners and a soft rag or cloth. They can give you the best experience of coming in a variety of styles.
Bathroom vanities with such unique backsplashes can give you the classic, sophisticated and aesthetic bathroom look you have been looking for. Choosing the right color, design, and texture that aligns with your personality can help you spend some beautiful times with yourself!